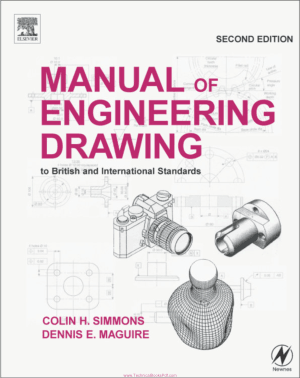
Manual of Engineering Drawing Second edition By Colin H Simmons and Dennis E Maguire

| AutoCAD Books , Mechanical Drawing | |
| Language | English |
| File Type | |
| 308 | |
| Views | 10,023 views |
| File Size & Downloads | Size 5.2 MiB Downloads 3757 |
Short Desciption:
This "Manual of Engineering Drawing Second edition By Colin H Simmons and Dennis E Maguire" book is available in PDF Formate. Downlod free this book, Learn from this free book and enhance your skills ...
Contents
Drawing office management and organization
Product development and computer-aided design
CAD organization and applications
Principles of first and third angle orthographic projection
Linework and lettering
Three-dimensional illustrations using isometric and oblique projection
Drawing layouts and simplified methods
Sections and the sectional view
Geometrical constructions and tangency
Loci applications
True lengths and auxiliary views
Conic sections and interpenetration of solids
Development of patterns from sheet materials
Dimensioning principles 100
Screw threads and conventional representations
Nuts, bolts, screws, and washers
Keys and keyways
Worked examples in machine drawing
Limits and fits
Geometrical tolerancing and datums
Application of geometrical tolerances
Maximum material and least material principles
Positional tolerancing
Cams and gears
Springs
Welding and welding symbols
Engineering diagrams
Bearings and applied technology
Engineering adhesives
Related standards
Production drawings
Drawing solutions
Preface
This latest edition of A Manual of Engineering Drawing has been revised to include changes resulting from the introduction of BS 8888. British Standard 308 was introduced in 1927 and acknowledged by Draughtsmen as THE reference Standard for Engineering Drawing. The British Standards Institution has constantly kept this Standard under review and taken account of technical developments and advances. Since 1927, major revisions were introduced in 1943, 1953, 1964 and 1972 when the contents of BS 308 Engineering Drawing Practice was divided into three separate sections.
Part 1: General principles.
Part 2: Dimensioning and tolerancing of size.
Part 3: Geometrical tolerancing.
In 1985, the fifth revision was metricated. During the period 1985–2000 major discussions were undertaken in co-operation with International Standards Organizations. The general trend in Engineering Design had been that the designer who was responsible for the conception and design of a particular product generally specified other aspects of the manufacturing process. Gradually, however, developments from increased computing power in all aspects of production have resulted in progressive advances in manufacturing techniques, metrology, and quality assurance. The impact of these additional requirements on the Total Design Cycle resulted in the withdrawal of BS 308 in 2000. Its replacement BS 8888 is a far more comprehensive Standard. The full title of BS 8888 reflects this line of thought.BS 8888. Technical product documentation (TPD).Specification for defining, specifying and graphically representing products. It must be appreciated and emphasized that the change from BS 308 to BS 8888 did not involve abandoning the principles of Engineering Drawing in BS 308. The new Standard gives the Designer a vastly increased number of tools at his disposal. It is important to stress that British and ISO drawing standards are not produced for any particular draughting method. No matter how a drawing is produced, either on an inexpensive drawing board or the latest CAD equipment, the drawing must conform to the same standards and be incapable of misinterpretation. The text which follows covers the basic aspects of engineering drawing practice required by college and university students, and also professional drawing office personnel. Applications show how regularly used standards should be applied and interpreted. Geometrical constructions are a necessary part of engineering design and analysis and examples of two and three-dimensional geometry are provided. Practice is invaluable, not only as a means of understanding principles but in developing the ability to visualize shape and form in three dimensions with a high degree of fluency. It is sometimes forgotten that not only does a draughtsman produce original drawings but is also required to read and absorb the content of drawings he receives without ambiguity. The section on engineering diagrams is included to stimulate and broaden technological interest, further study, and be of value to students engaged on project work. Readers are invited to redraw a selection of the examples given for experience, also to appreciate the necessity for the insertion and meaning of every line. Extra examples with solutions are available in Engineering Drawing From First Principles using AutoCAD, also published by Butterworth-Heinemann. It is a pleasure to find an increasing number of young ladies joining the staff in drawing offices where they can make an effective and balanced contribution to design decisions. Please accept our apologies for continuing to use the term ‘draughtsmen’, which is the generally understood collective noun for drawing office personnel, but implies equality in status. In conclusion, may we wish all readers every success in their studies and careers? We hope they will obtain much satisfaction from employment in the absorbing activities related to creative design and considerable pleasure from the construction and presentation of accurately defined engineering drawings.


